
How to make your own media server at home with Jellyfin and the Arr stack
Have you ever wanted to free yourself from your multiple monthly subscription to Netflix, Amazon Prime Video, Disney+, etc ? Self-hosting is the answer. Today, I’m going to show you how you can build your own media server to download, manage and -most importantly- watch your favorite movies and show. For this, you will either need a server (an old computer will most likely do the trick) or a virtual machine running 24/7 (or everytime you want to watch something).
DISCLAIMER : To build your own media server, many alternatives exists. In this post, I’m going to show you how to install and configure Jellyfin, Radarr, Sonarr, Lidarr, Readarr and qBittorrent on a server, but keep in mind you could also do it using Docker or replace some software with other ones like Plex (Media Server) or Deluge (Torrent).
Requirements
As I said earlier, we’re going to install our media server on a virtual machine (VM) / server. In my case, I’ll be using a Debian 12 VM hosted on my Proxmox VE home server. I recommend using at least a 4 vCPUs VM (4 cores) and 8GB of RAM to be sure everything goes smoothly.
The other thing you’re gonna need is storage, a lot of it. Movies and TV Shows can quickly take a lot of space in your hard drive. So I advice you to use multiple big hard drives or a NAS to store your data. Also, if you can, remember to setup RAID so that you don’t loose your content if one of your hard drives malfunction.
Finally, I strongly suggest you use a VPN in order to download content. You can find tutorials on the internet on how you can link up your VPN to qBittorrent.
Installation
Jellyfin installation
First of all, we’re going to update the debian repositories using this command.
sudo apt update
Then, if you don’t have it, you will need to install cURL
sudo apt install cURL
Thankfully, Jellyfin installation is pretty straight forward, the only command you will need to run is
curl https://repo.jellyfin.org/install-debuntu.sh | sudo bash
qBittorrent installation
qBittorrent is also kind of quick, with minimal tweakering needed.
Step 1
First, you will need to install qBittorrent-nox using apt.
Note: qbittorrent-nox is more suited for headless systems and includes a web interface for management, while qbittorrent is a graphical client.
sudo apt install qbittorrent-nox
Step 2
For security reasons, it is preferable to run qBittorrent as an unprivileged user (non-root). So we will create a new user and a new group for qBittorrent.
sudo adduser --sytem --group qbittorrent-nox
Since this user will only be used by qBittorrent process, we create it as a system user, which doesn’t have the same capabilities as a regular user.
We will also need to add our user to the qBittorrent-nox group. In my case, my username is nathan.
sudo adduser nathan qbittorrent-nox
Step 3
Last step, we will create a Systemd service file for qbittorent-nox. This config file will define how the service will run.
sudo nano /etc/systemd/system/qbittorrent-nox.service
In this file, we are going to copy the following lines:
[Unit]
Description=qBittorrent Command Line Client
After=network.target

[Service]
Type=forking
User=qbittorrent-nox
Group=qbittorrent-nox
UMask=007
ExecStart=/usr/bin/qbittorrent-nox -d --webui-port=8080
Restart=on-failure

[Install]
WantedBy=multi-user.target
We can now save and close this file by pressing CTRL+X then Y then ENTER.
Finally, we will reload the systemd daemon, start and enable qbittorrent-nox.
sudo systemctl daemon-reload
sudo systemctl start qbittorrent-nox
sudo systemctl enable qbittorrent-nox
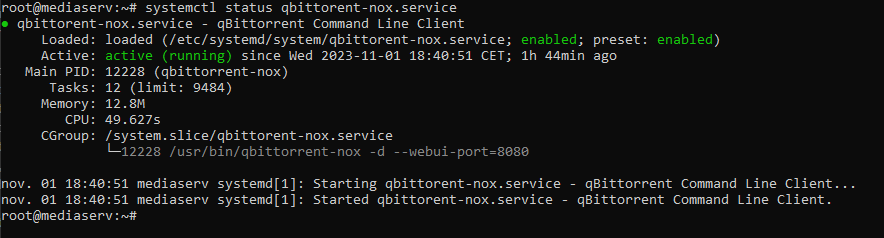
The command systemctl status qbittorrent-nox tell us if the service is correctly running.
Conclusion
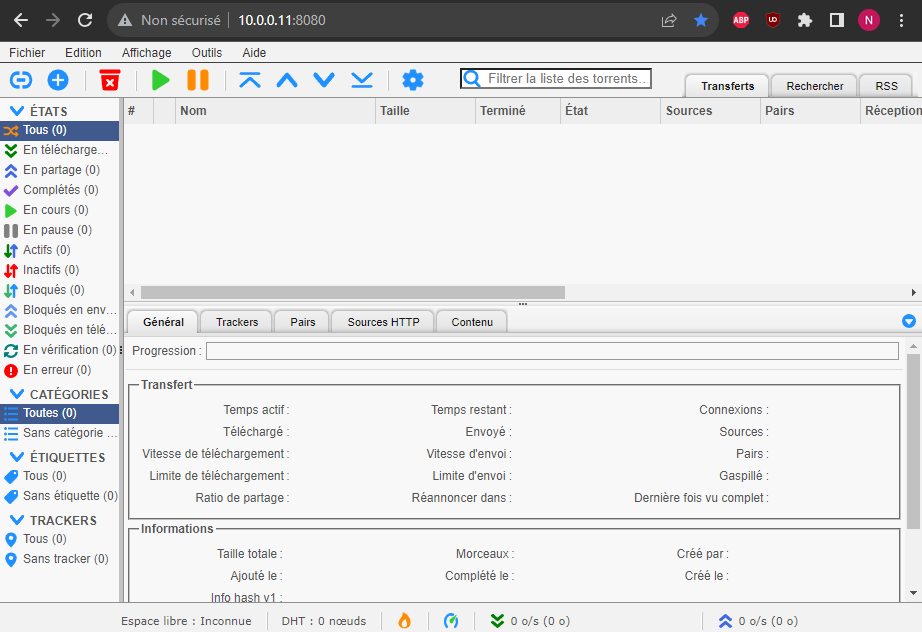
We can now acces qBittorrent web interface on http://localhost:8080 (or if you’re accessing it remotely, http://SERVERIP:8080).
Troubleshooting
If systemctl status qbittorrent-nox gives you an error, it is most likely due to qBittorrent not being able to create required directories. The following commands should fix this:
sudo mkdir /home/qbittorrent-nox
sudo chown qbittorrent-nox:qbittorrent-nox /home/qbittorrent-nox
sudo usermod -d /home/qbittorrent-nox qbittorrent-nox
sudo systemctl start qbittorrent-nox